On the other hand, everyday users could use it to install official OTA updates via stock recovery. However, in spite of all the goodies involved, there is still some confusion surrounding this feature. But with this guide, you could put all these doubts to rest. Today, we will show you all the required information on how you could use the ADB Sideload feature to flash or install ZIP files in both the stock and custom recovery like TWRP. Follow along.
Detailed Guide to Fix All ADB and Fastboot ErrorsHow to Execute Android ADB Fastboot Commands WirelesslyHow to Use ADB and Fastboot Commands on Android Without PCRun ADB Fastboot Commands directly on Android without Root
What is ADB Sideload
ADB sideload is the feature in Android devices that allows you directly install or flash ZIP files onto your device via a single ADB command. Its usage scenario depends on the user set, the enthusiasts mostly use it to flash mods and tweaks that come in ZIP packages. On the other hand, the general user makes use of this feature to manually install OTA updates. However, no matter to which domain you belong, one thing stays the same- you could only install ZIP files via it. Furthermore, for the users who would be using it via TWRP, there’s another thing to keep in mind. The Sideload feature isn’t used to transfer files from your PC to your device. Rather, it will directly install the ZIP file onto your device. If you are just looking to transfer files, then you should instead look out for other TWRP options such as Mount, MTP, among others. Likewise, the same stands true in the case of stock recovery. The OTA update file will directly be installed onto your device, without being transferred first. So with this, we hope that you have got a decent idea regarding the adb sideload command and its importance. Let’s now check out the steps to use ADB Sideload and install ZIP files in stock and TWRP Recovery. The requirements are slightly different for both these methods, so we have mentioned them under separate sections. Follow along.
How to Use ADB Sideload in Stock Recovery
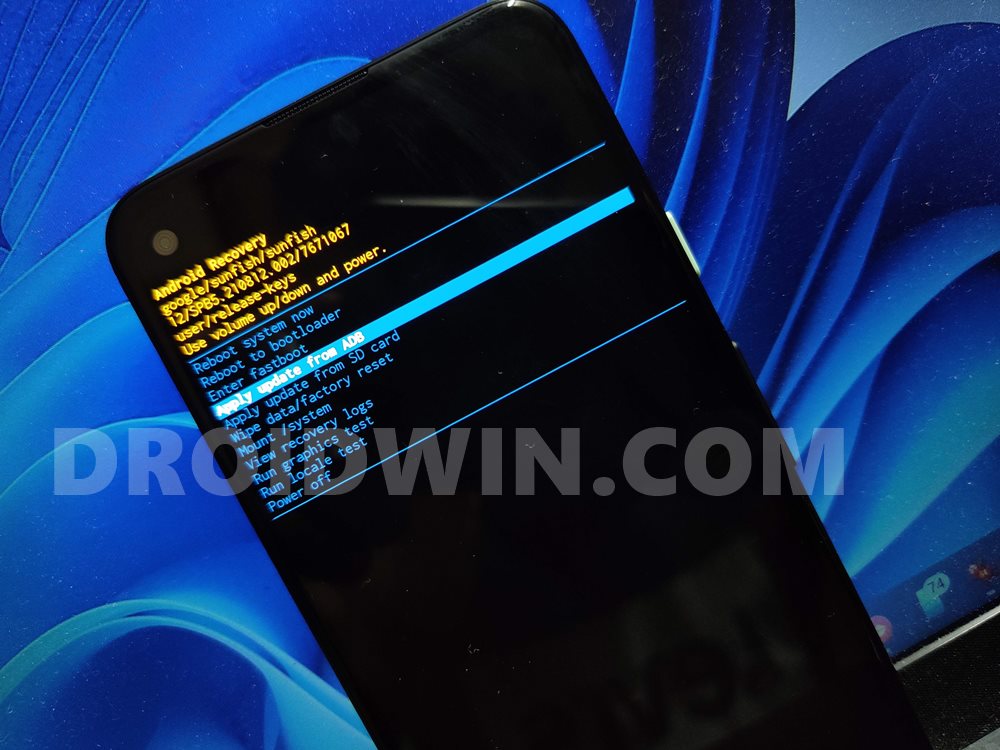
The major use of ADB sideload in stock recovery is for the installation of OTA or firmware updates. In this regard, there are two different options: Apply Update from ADB and Apply Update from SD Card. So what’s the difference between them? Well, the Apply Update from ADB option allows you to install the ZIP file via ADB commands. Whereas the Apply Update from SD Card directly installs the update ZIP file from your device. As for this guide, our focus will be on the former. So without further ado, let’s get going. Droidwin and its members wouldn’t be held responsible in case of a thermonuclear war, your alarm doesn’t wake you up, or if anything happens to your device and data by performing the below steps to install ZIP via adb sideload and TWRP or stock recovery.
Manually Install OTA via Apply Update from ADB
We are listing the required instructions under separate sections for ease of understanding. Proceed ahead in the exact sequence as mentioned:
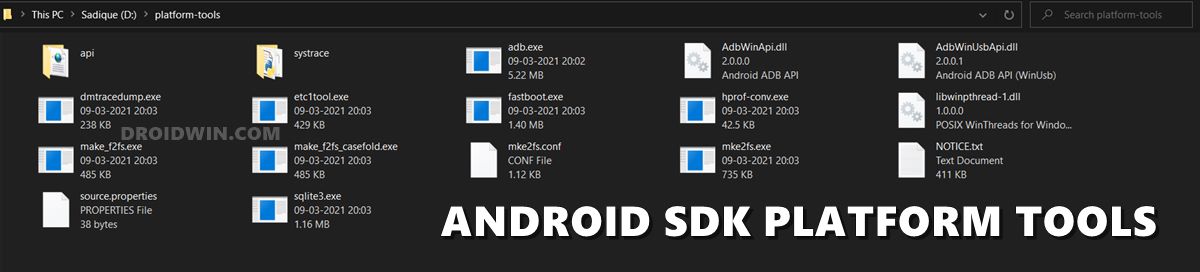
Install ADB Tools on your PC
To begin with, download and extract the Android SDK Platform Tools on your PC. This is the official ADB and Fastboot binary collection provided by Google and you should use this only. Once extracted, you should get the platform-tools folder. Keep this folder open, as we will be using it throughout this section.
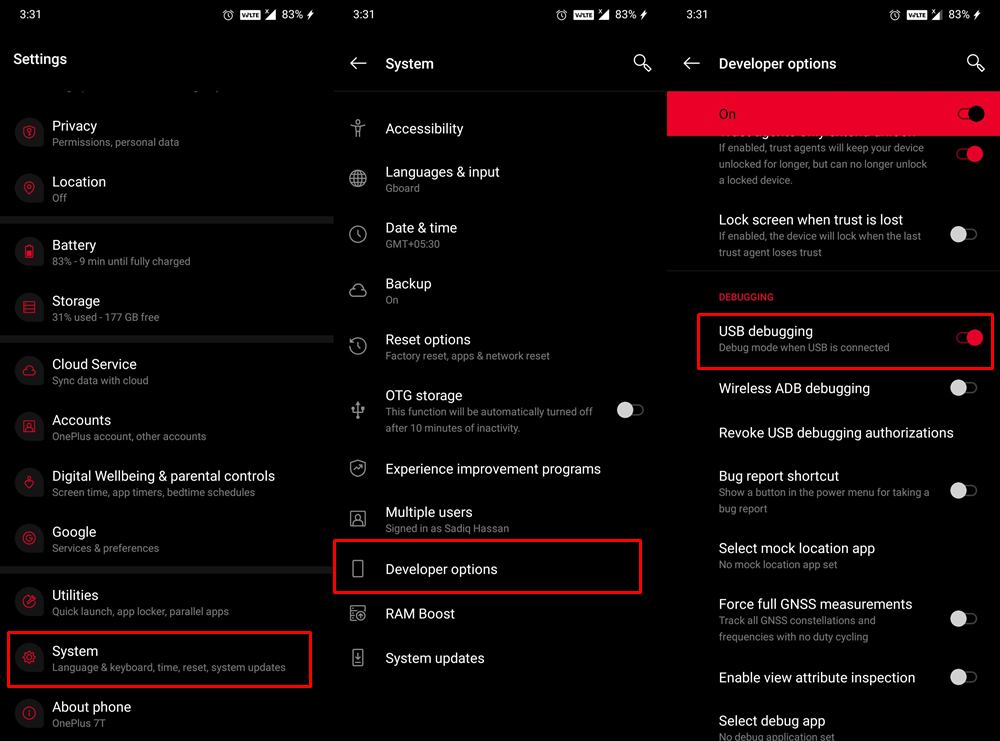
Enable USB Debugging [For Working Devices]
UPDATE: Just to clarify, ADB Sideload does not require you to have USB Debugging enabled. We have only listed this step here so that we could boot the device to the stock recovery via ADB Command. If your device is stuck in Fastboot/Bootloop, then it’s not a cause of concern, you could still use the ADB Sideload method (explained in subsequent steps below). So if your device cannot access the OS, then just skip this step and move over to the next one. If your device is working, you will have to enable USB Debugging on your device. This is required so that the PC is able to identify the device in ADB Mode. So head over to Settings > About Phone > Tap on Build Number 7 times > Go back to Settings > System > Advanced > Developer Options > Enable USB Debugging and OEM Unlocking. [Don’t Miss: Workarounds to Enable USB Debugging on a Broken Android Device Screen].
Download Update File
Now download the required OTA or firmware update file for your device. Make sure that it is in a ZIP format. Likewise, rename this file to update.zip, so that it would be easy to write in the CMD prompt. Then transfer this file to the platform-tools folder as well.
Boot Android Device to Stock Recovery
There are two case scenarios here- when your device is in a perfectly working condition, and when your device is stuck in Fastboot Mode. We have listed the steps to boot to Recovery Mode for both these cases. You may refer to the one that meets your current device condition.
Boot to Recovery when Device is working
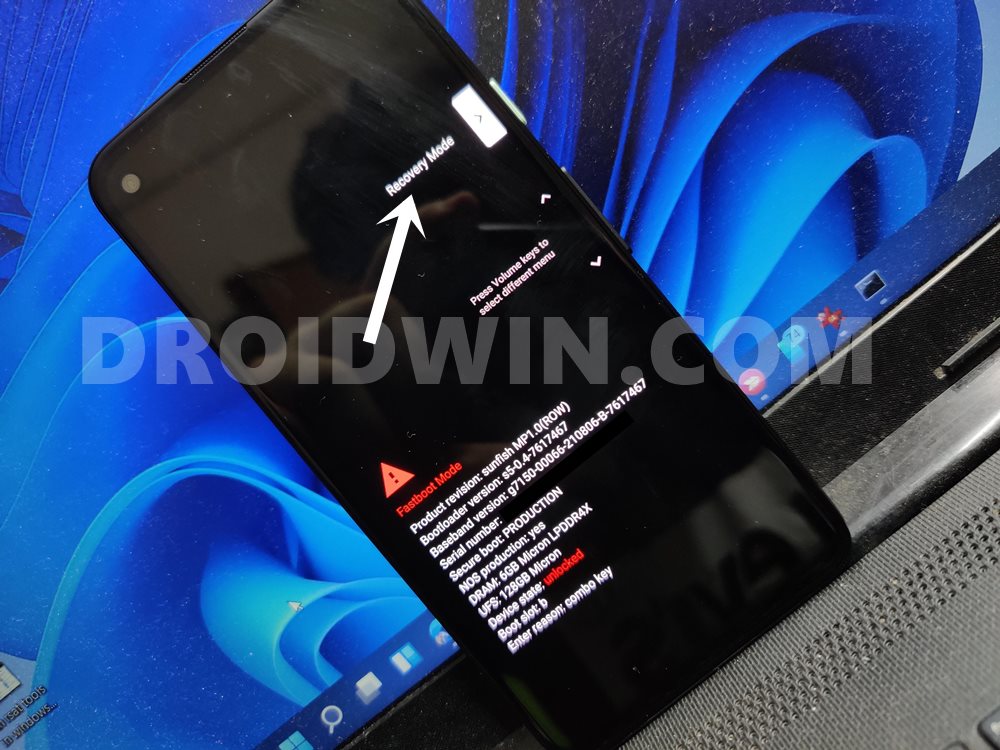
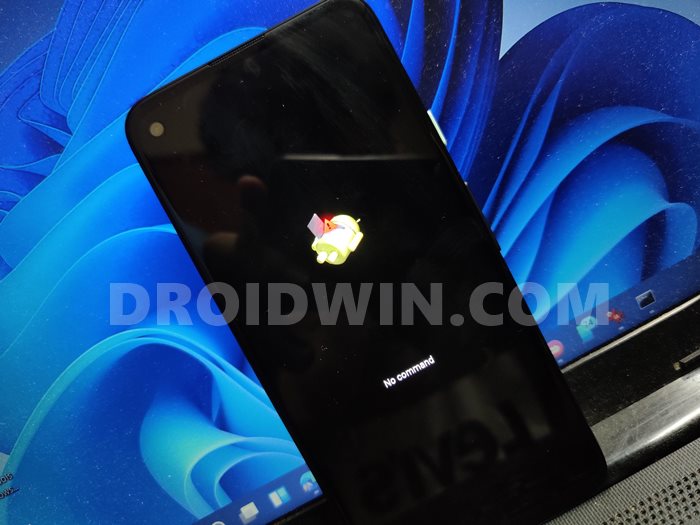
Boot to Recovery When Device is Stuck in Fastboot
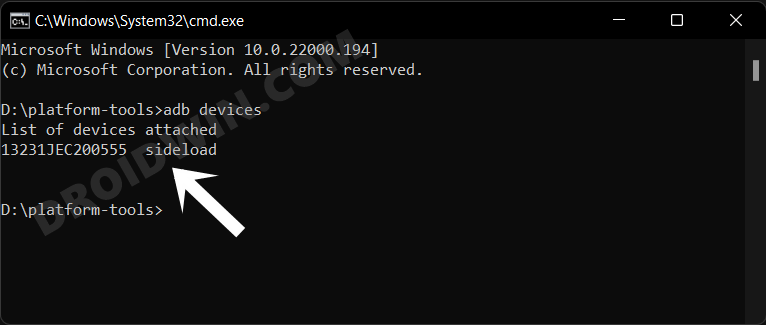
Use ADB Sideload to Manually Install OTA Update
That’s it, your device will now boot to the newly installed update. So this is how you could use the ADB sideload command in the stock recovery. Let’s now turn our attention towards the usage of this adb sideload feature in the custom development field i.e TWRP Recovery.
How to Use ADB Sideload in TWRP Recovery
While the usage of Sideload in TWRP is also limited to flashing ZIP files, but in this instance, this file takes a broader approach. As opposed to stock recovery usage where the ZIP was treated as a firmware update file, here a ZIP file could mold into various scenarios. For example, it could be a Magisk Module or even a Custom ROM. The instructions steps, however, remain the same. So on that note, let’s check out the steps to use the ADB sideload feature in the TWRP Recovery.
Install ADB on your PC
First off, download Android SDK Platform Tools on your PC. These are the official ABD and Fastboot binary provided by Google. So download and extract it to any convenient location on your PC. doing so shall give you the platform-tools folder. We will be using this folder only to flash ZIP via adb sideload and TWRP in the below steps, so keep it open.
Unlock the Bootloader
To begin with, you will have to unlock the device’s bootloader (this is the first prerequisite for installing a custom recovery like TWRP). Do keep in mind that doing so will wipe off all the data from your device and might also make the warranty null and void. So if that’s well and good, then refer to our guide to Unlock Bootloader of Any Android Device.
Install TWRP Recovery
Next up, you will also have to install TWRP Recovery on your Android device. To do so, there are two different approaches- you could either temporarily install TWRP for one-time usage or permanently install it. Here are the instructions for both:
Temporary Installation How to Boot into TWRP RecoveryPermanent Installation: How to Install TWRP Recovery on Android
Boot Android Device to TWRP Recovery
Root your device [Optional, Depends on the File Type]
This is an optional step and depends on the type of ZIP files that you are going to flash via adb sideload and TWRP. If it’s a custom ROM, then you don’t need to root your device. On the other hand, if you are planning to flash a Magisk module or any related mods, then rooting is a must. For this, you may refer to our following guides:
How to Root Android Devices via TWRP RecoveryRoot Android Devices Without TWRP RecoveryHow to Root any MediaTek ARMv8 DeviceRoot Spreadtrum Devices via Magisk Patched boot.imgRoot any MediaTek Device on Locked Bootloader
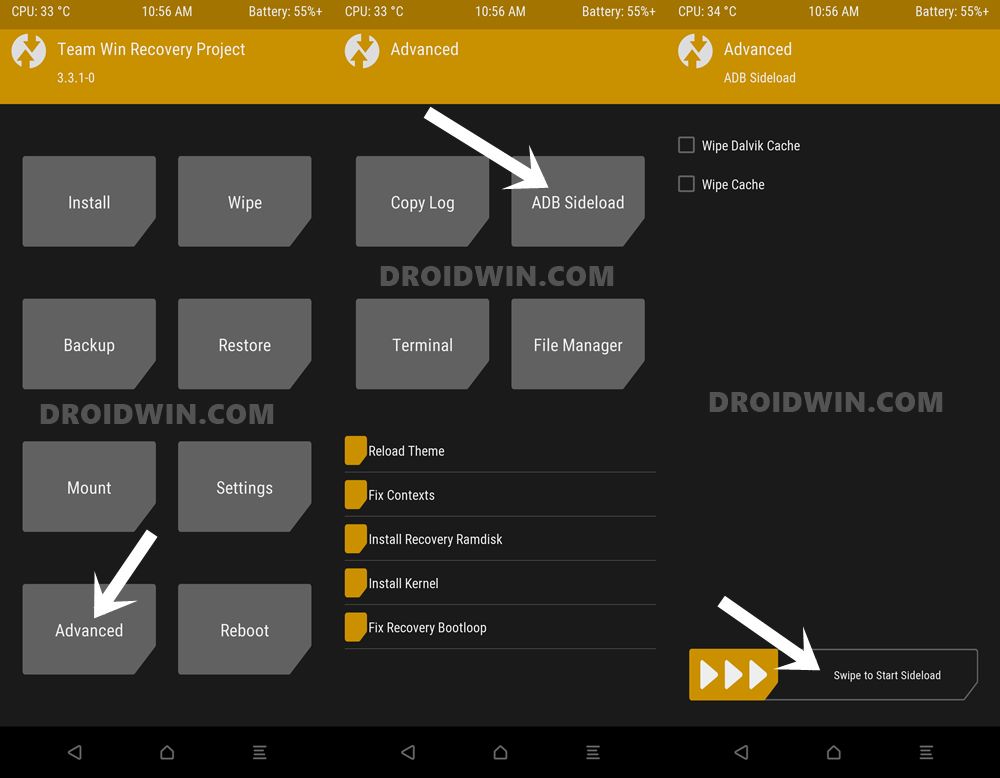
Install ZIP via TWRP ADB Sideload
That’s it, the process stands complete. So with this, we conclude the guide on how to use the adb sideload command on both the stock as well as custom TWRP Recovery. If you have any queries concerning the aforementioned steps, do let us know in the comments. We will get back to you with a solution at the earliest.
About Chief Editor


![]()