While this is indeed an easy method, but at the time of writing, these devices have yet to be blessed with a fully working TWRP. Even when it gets available, some users usually prefer to maintain a safe distance from it. The reason is mostly from the complexity involved in flashing a custom recovery, more so after the A/B Partition. As a result, they turn their attention towards the second method. This involves patching the stock boot.img file via Magisk and then flashing it via Fastboot Commands. And in this guide, we will be focusing on this method itself. So without further ado, let’s start off with this guide to root Moto G9/Power/Play/Plus via Magisk without using TWRP Recovery.
How to Root Moto G9/Power/Play/Plus via Magisk without TWRP
The below instructions are listed under separate sections for ease of understanding. Make sure to follow in the exact same sequence as mentioned below. Droidwin and its members wouldn’t be held responsible in case of a thermonuclear war, your alarm doesn’t wake you up, or if anything happens to your device and data by performing the below steps.
Install Android SDK
To begin with, install the Android SDK Platform Tools on your PC. This is the official ADB and Fastboot binary provided by Google and is the only recommended one. So download it and then extract it to any convenient location on your PC. Doing so will give you the platform-tools folder, which will be used throughout this guide.
Enable USB Debugging and OEM Unlocking
Next up, you will have to enable USB Debugging and OEM Unlocking on your device. The former will make your device recognizable by the PC in ADB mode. This will then allow you to boot your device to Fastboot Mode.
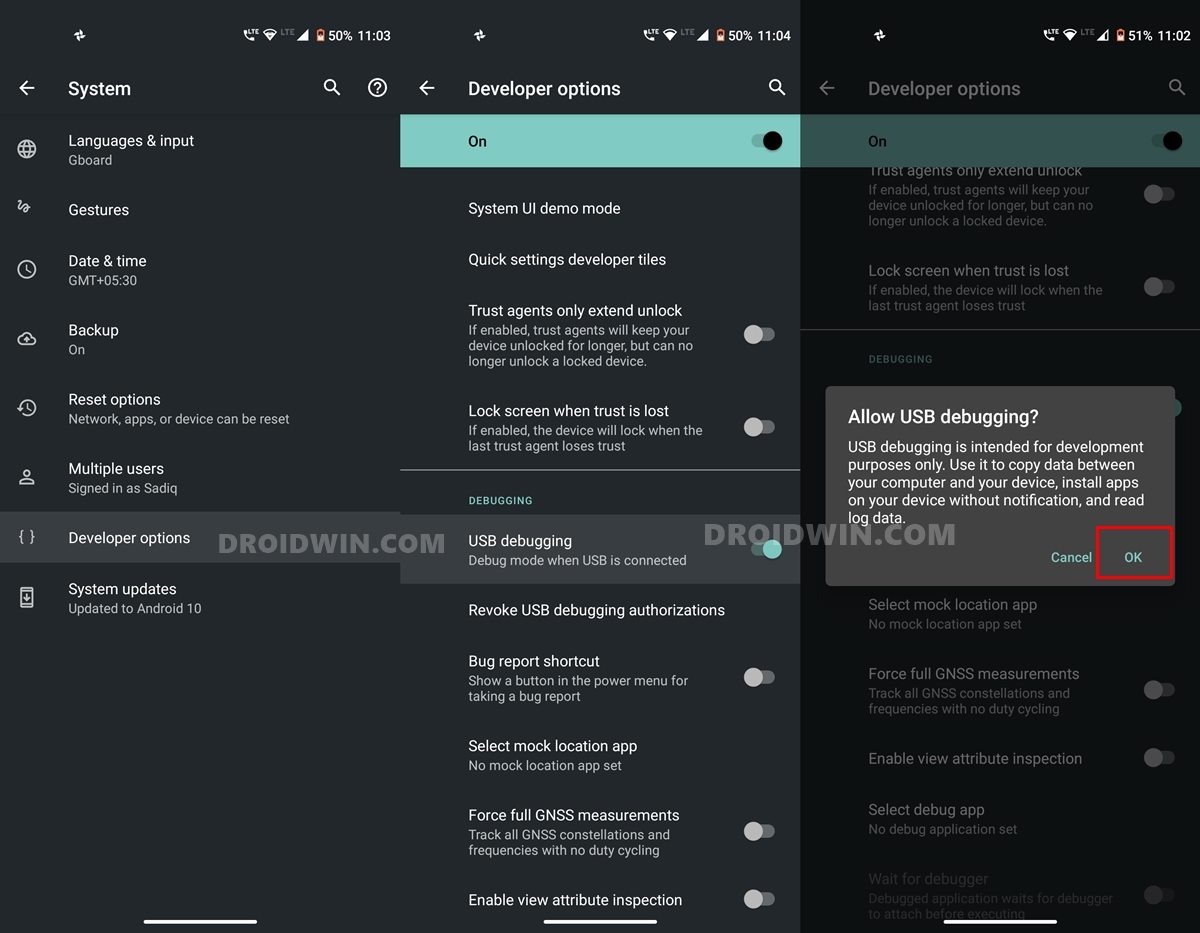
On the other hand, OEM Unlocking is required to carry out the bootloader unlocking process. So head over to Settings > About Phone > Tap on Build Number 7 times > Go back to Settings > System > Developer Options > Enable USB Debugging and OEM Unlocking.
Unlock Bootloader on Moto G9/Power/Play/Plus
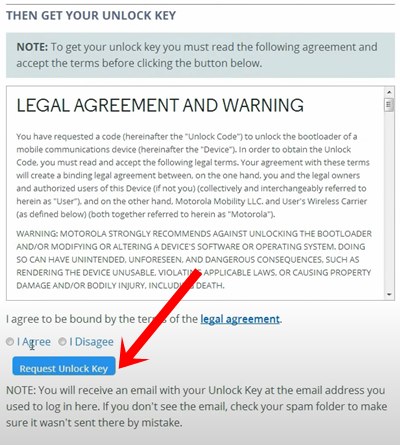
You will also have to unlock the bootloader on your Moto G9/Power/Play/Plus if you wish to root it via Magisk without using TWRP. Do keep in mind that doing so will wipe off all the data and might make the device’s warranty null and void as well. So if that’s well and good, then refer to our guide to How to Unlock Bootloader on any Motorola Device.
Extract Moto G9/Power/Play/Plus Boot.img from Stock Firmware
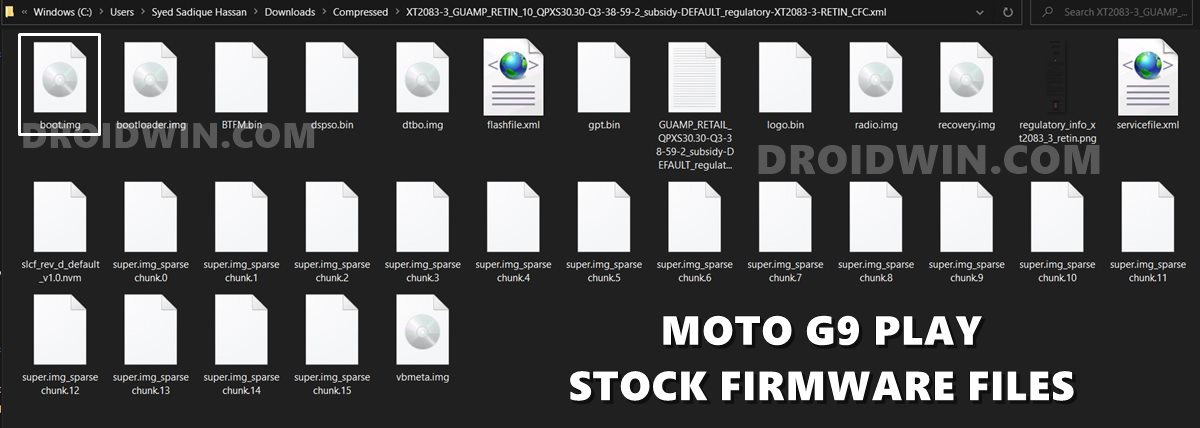
Currently, I am using the Moto G9 Play (guamp) XT2083-3 RETIN Build: QPXS30.30-Q3-38-59-2. So if you are also on the same firmware version, then you could directly download the stock boot.img file here, and skip with the firmware downloading process: XT2083-3_GUAMP_RETIN_10_QPXS30.30-Q3-38-59-2_boot.img. [You may check the currently installed firmware from the device’s About Phone/Build Number section].
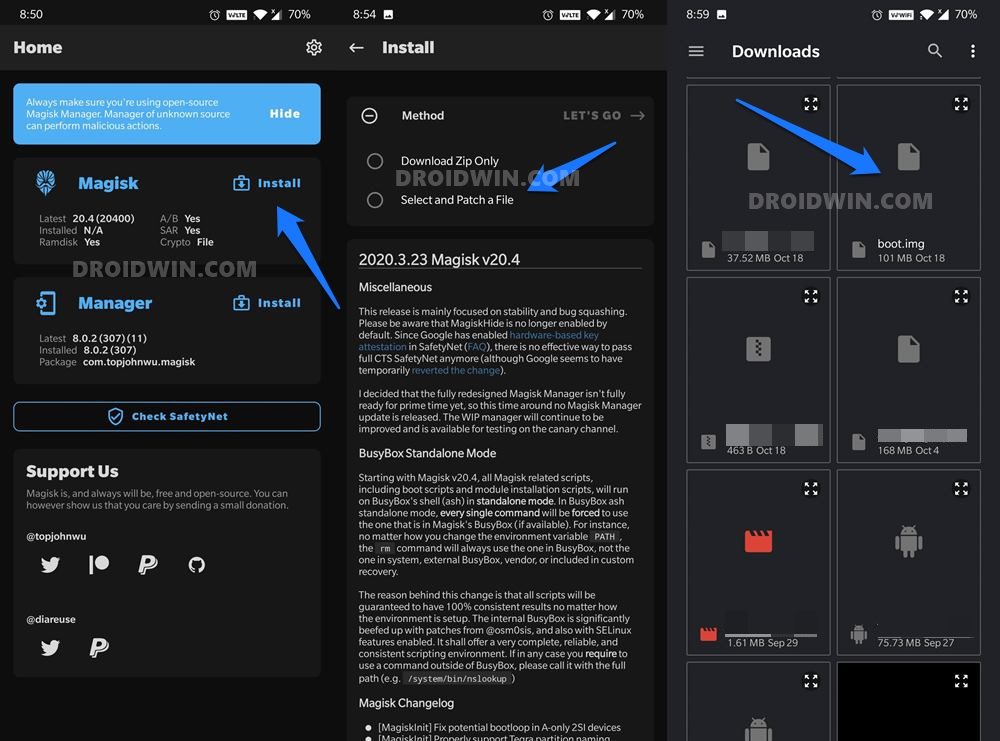
If you are not on the same build/region/device, then you will have to download the stock firmware from Lolinet Mirror corresponding to your device/region/current firmware. Once downloaded, extract it to any convenient location on your PC. Then copy the boot.img from it and transfer it to your device. We will now patch this file to root Moto G9/Power/Play/Plus via Magisk without using TWRP Recovery.
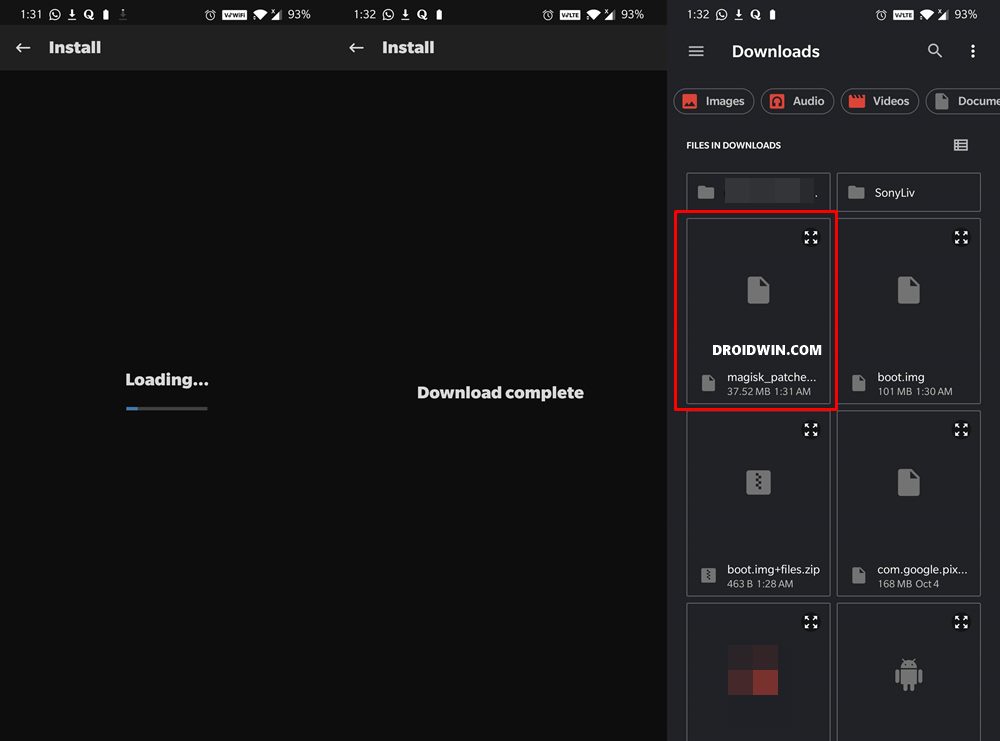
Patch Moto G9/Power/Play/Plus Stock Boot.img via Magisk
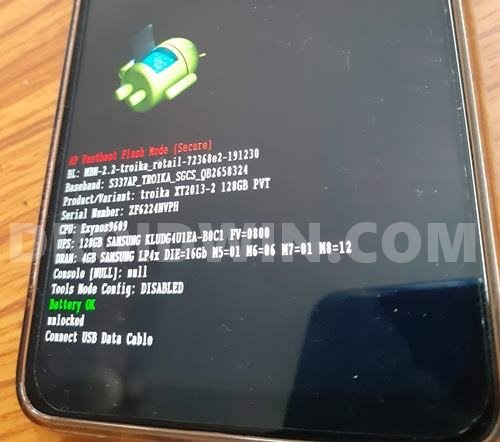
Boot Moto G9/Power/Play/Plus to Fastboot Mode
Flash Magisk Patched Boot.img and Root Moto G9/Power/Play/Plus
That’s it. These were the steps to root Moto G9/Power/Play/Plus via Magisk without using TWRP Recovery. If you have any queries concerning the aforementioned steps, do let us know in the comments. We will get back to you with a solution at the earliest.
About Chief Editor
