Well, in some instances an app or software might not function along the expected lines and the root cause of the same could be linked to their particular service. To rectify this issue, you will either have to disable/re-enable their services or stop and then restart them. Likewise, in some cases, a third-party service might conflict with the other system apps and services and hence you might have to disable or stop those buggy services. Moreover, some of the non-essential services are also known to hog excessive system resources, which leads to high CPU and RAM usage. So in all these scenarios, the best bet is to disable or stop these services on your Windows 11 PC. And in this guide, we will show you how to do just that using four different methods. These include the System Configuration, Services Menu, Task Manager, and Command Prompt. You may refer to the one that is in sync with your requirement.
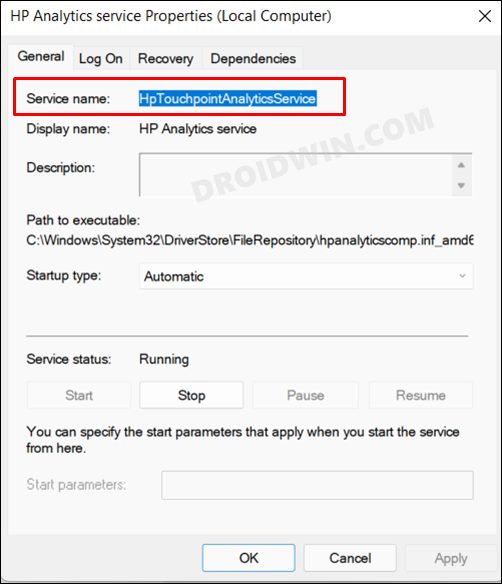
How to Stop Windows 11 Services via Services Menu
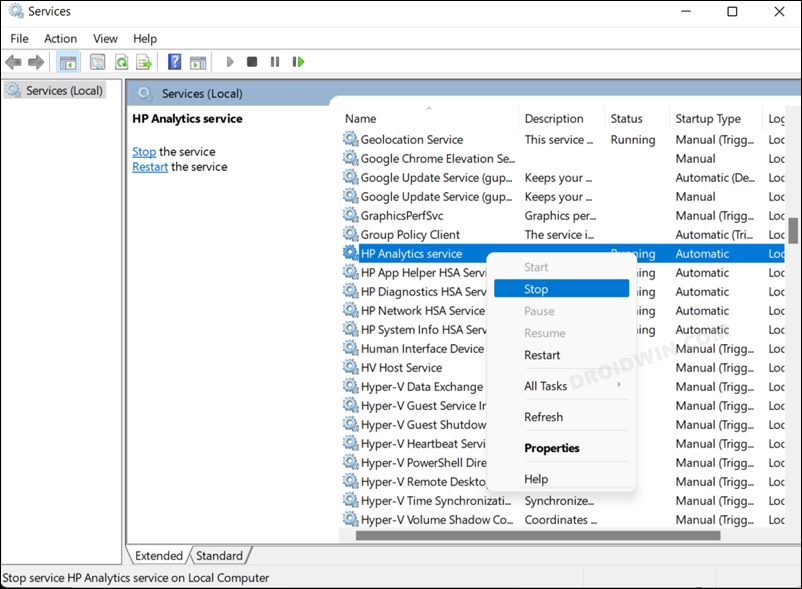
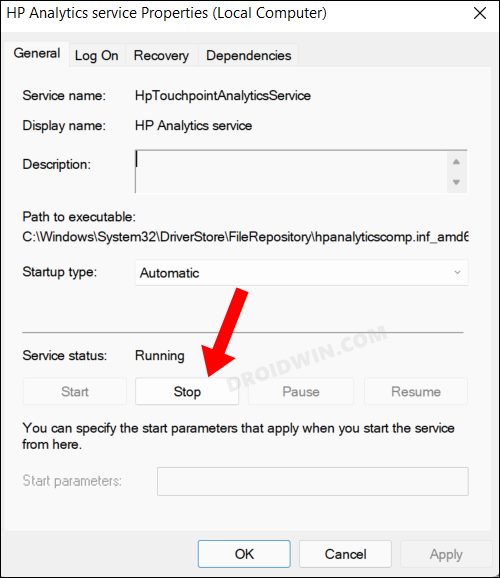
This is the most straightforward and well-known approach that is usually opted for by the users. One downside is that you will only be able to stop/start a service using this method, not disable/enable it. So on that note, let’s get started. So these were the two different approaches to stop a service in Windows 11 via the Services app. If at any point in time, you wish to restart that service, just right-click on it and select Start. Or you could also right-click on it, select Properties and then click the Start button.
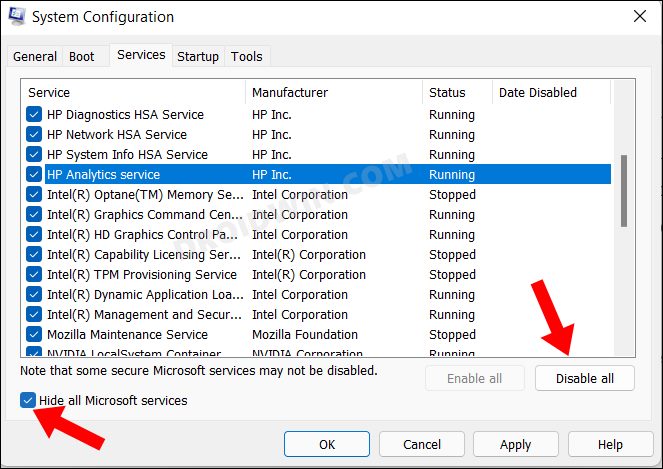
How to Disable Windows 11 Services via System Configuration
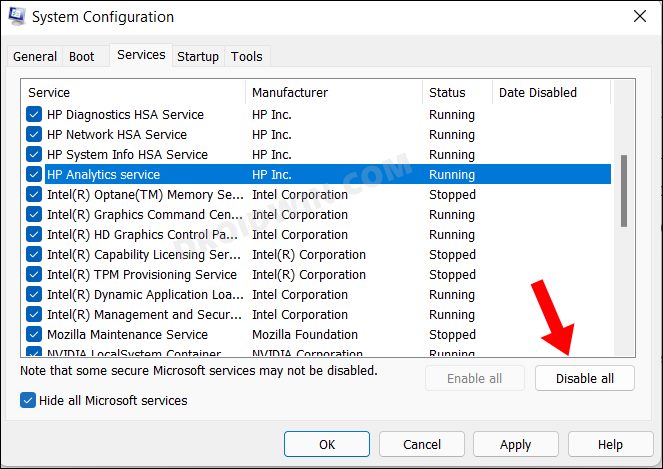
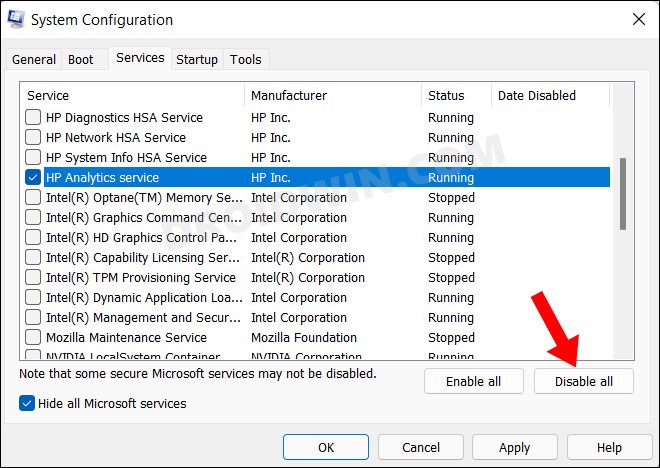
This method comes with two big advantages. First off, you could easily disable all the services with just a single click. Likewise, you could also disable all the non-Microsoft Services in just one click, without the need for manual segregation of Microsoft and non-Microsoft services. The downside? Well, it just allows you to disable services and not stop them. So if that’s well and good, then let’s get started. These were the steps to disable services in Windows 11 via the System Configuration menu. To enable any of the disabled services, just select the desired service/services and click on the Enable All button.
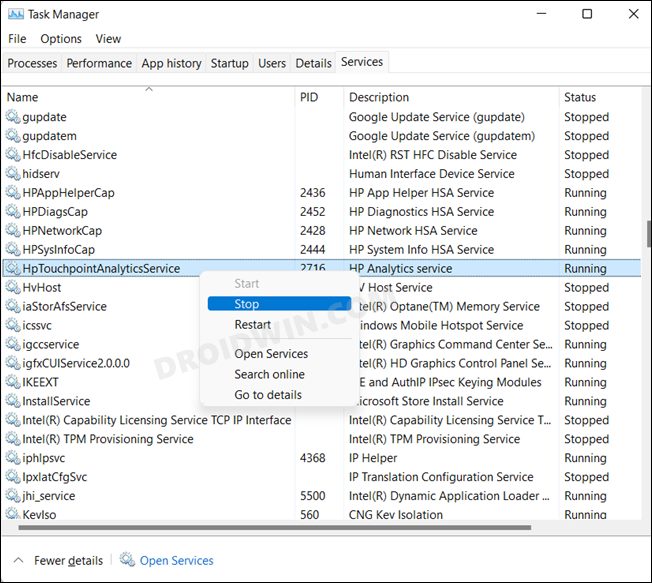
How to Stop Windows 11 Services Using Task Manager
This method is quite easy to execute but on the flip side, you will only be able to stop the services, not disable them. This is because its root lies in the Services menu (that we discussed in Method 1). So whatever drawback and perks this method has, it is the same as the one that the Services app has. So with that in mind, let’s check out this method: So this was the short and quick method to stop WIndows 11 services via Task Manager. If at any point in time, you wish to restart the service, then just right-click on the disabled service and select Start.
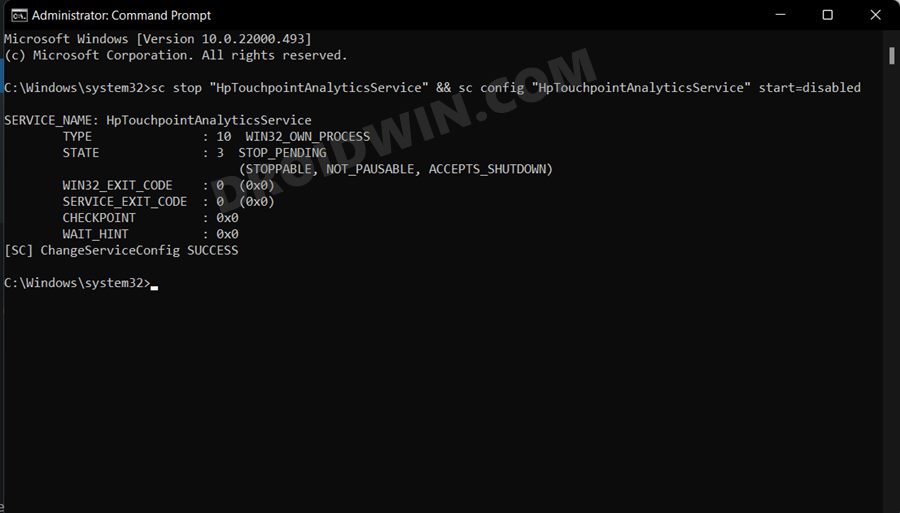
Stop and Disable Windows 11 Services Via Command Prompt
This is the only method out of the four that supports both the disabling and stopping of services. However, this method is also somewhat time-consuming and technical in nature. Keeping both these points in mind, let’s get started.
Disable Service via CMD
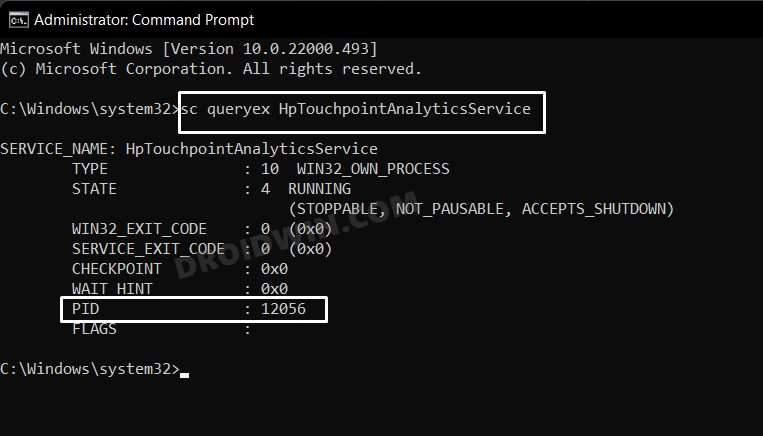
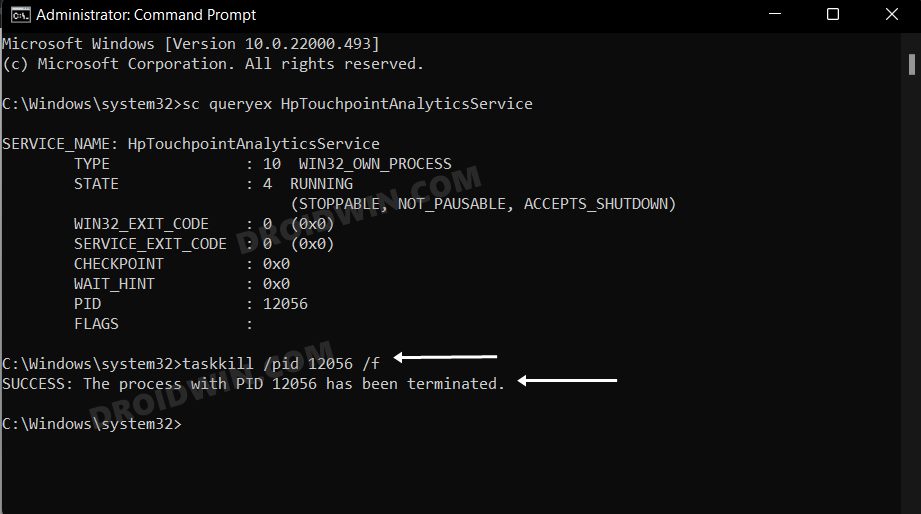
Stop Service via CMD
So with this, we round off the guide on how you could disable and stop service in Windows 11. We have shared four different methods for the same. Do let us know which one you ultimately decided to settle for. Likewise, all your queries are welcomed in the comments section below.
How to Enable All CPU Cores in Windows 11Stop Windows 11 from Automatically Installing Bloatware AppsHow to Stop Automatic Driver Updates in Windows[5 Methods] How to Stop or Disable Windows 11 Update
About Chief Editor
