Not only for the general users, but it also has something in store for the tech enthusiast as well. Among them, it is the ability to gain administrative access by rooting the device via Magisk which has always been at the top of the priority queue. But what happens to the OTA updates? Well, while you will still continue to receive the updates as before, you wouldn’t be able to install them the normal way. This is because your device no longer has the stock boot.img but rather the patched one. Moroever, once you install the update and reboot the device, the slot change will take place. In other words, the inactive slot will now become the active slot, but we had never installed the OTA in this “new” active slot. Owing to all these reasons, you cannot deal with the OTA the native way. Rather, you will have to make some changes before as well as after installing the update. And in this guide, we will help you with just that. So without further ado, let’s get started with the steps to install the OTA update on your rooted Nothing Phone 1.
How to Install OTA Update on Rooted Nothing Phone 1
Before starting with the below process, it is recommended to take a complete device backup. Droidwin and its members wouldn’t be held responsible in case of a thermonuclear war, your alarm doesn’t wake you up, or if anything happens to your device and data by performing the below steps.
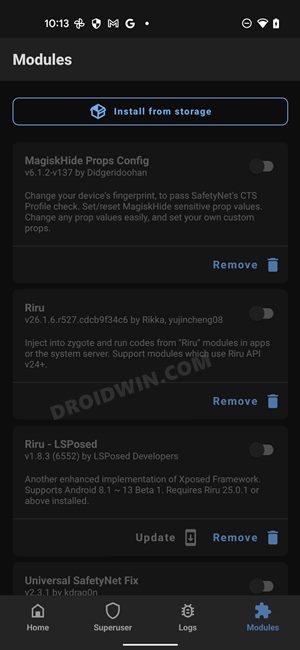
STEP 1: Disable All Modules
First and foremost, you will have to disable all the Magisk Modules otherwise it might conflict with the OTA installation process [you could re-enable them later on]. So launch the Magisk App, go to the Modules section, and turn off the toggle next to all the modules.
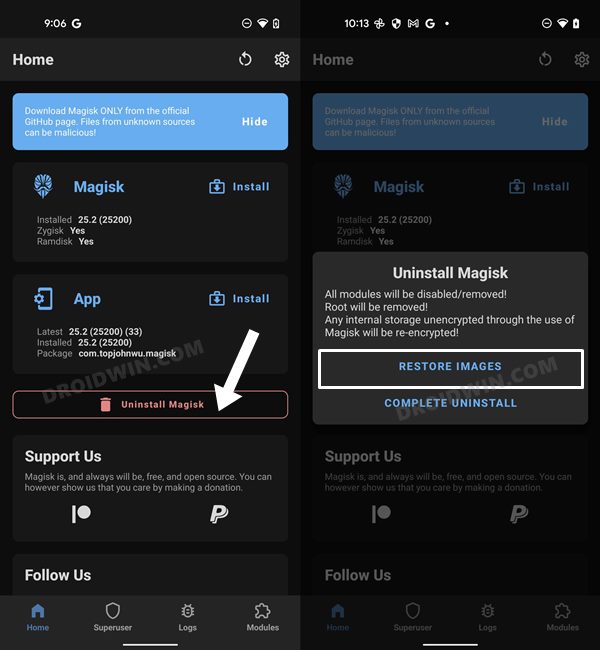
STEP 2: Restore Stock Boot Image
In this process, Magisk will replace the patched boot.img with the stock boot.img that it had taken a backup of just before you had rooted your device initially. In simple words, your device will be unrooted, for now. Likewise, if any modules were active, it will disable them as well. So launch the Magisk app and tap on Uninstall Magisk > Restore Images.
STEP 3: Install OTA Update
You could now go ahead and download and install the OTA update from the Settings menu. Once downloaded, do not reboot your device.
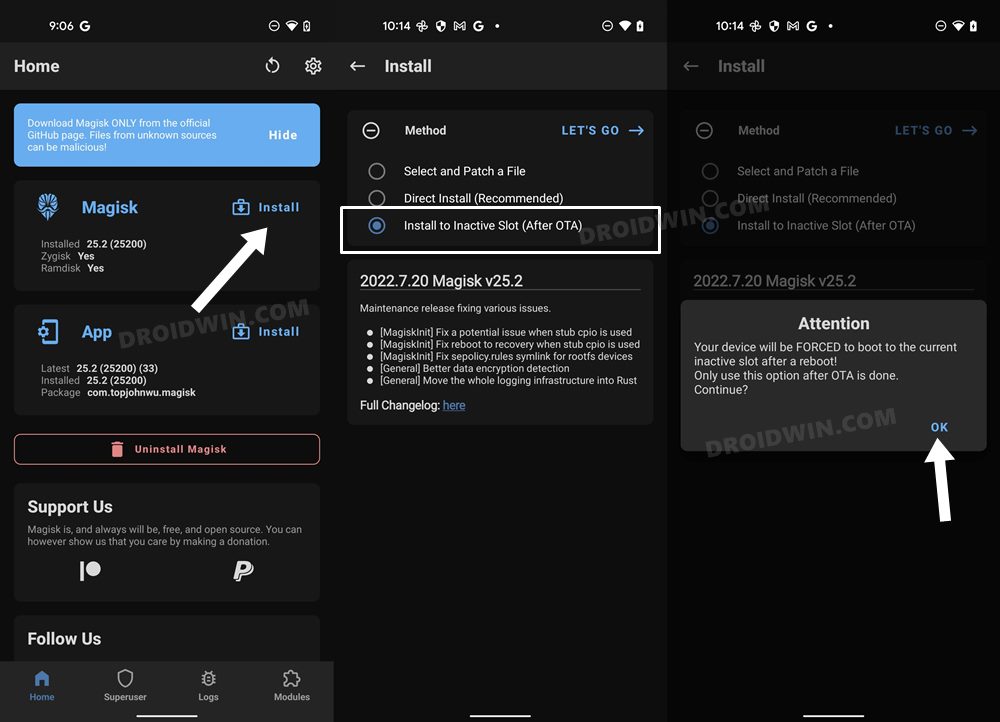
STEP 4: Install Magisk to Inactive Slot
The OTA update that you had just downloaded has been installed to the inactive slot. So you will now have to flash the Magisk patched boot.img to that inactive slot, in other words, “root the inactive slot”. Here’s how it could be done: That’s it. These were the steps to install the OTA update on your rooted Nothing Phone 1. If you have any queries concerning the aforementioned steps, do let us know in the comments. We will get back to you with a solution at the earliest.
Fix: Nothing Phone 1 Stuck in Bootloop
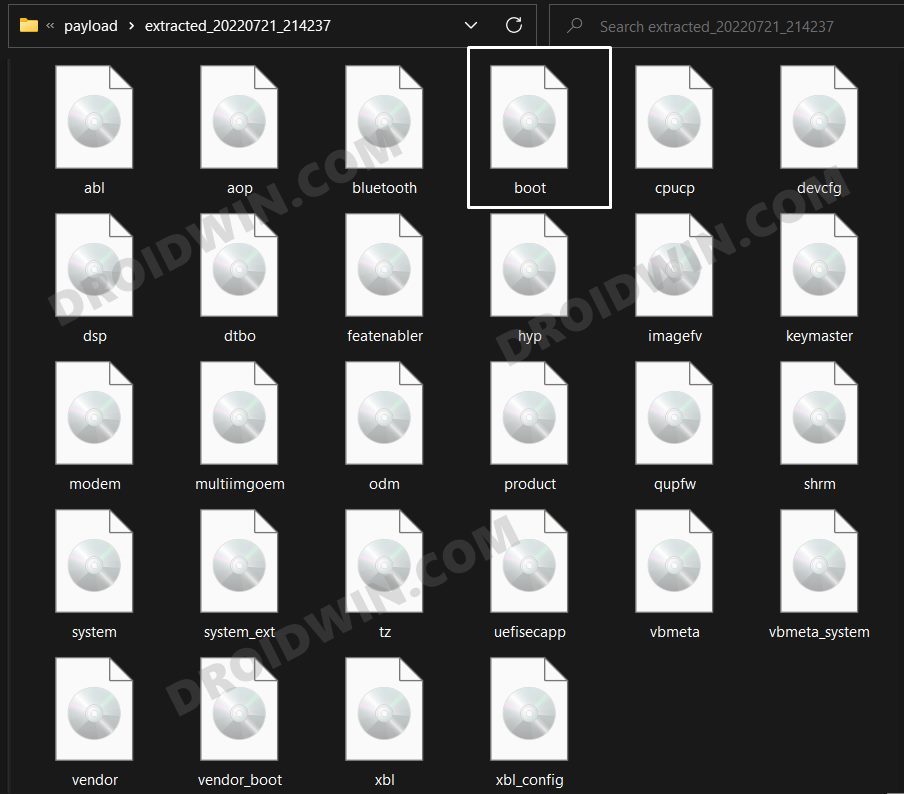
If for some reason, your device ends up in a bootloop, then fret not. You could easily fix this bootloop and boot your device back to the OS. Here’s how. [If you are currently on Nothing OS 1.1.0, then you may directly download the boot.img from here and skip STEP 1 and 2 below] That’s it. You may now again root your device via this guide: Root Nothing Phone 1 via Magisk Patched Boot.img. On the other hand, if you are still facing any issues, then you will have to flash the entire firmware via Fastboot Commands. For that, check out our guide on Unbrick Nothing Phone 1: Flash Stock Firmware via Fastboot Commands. On that note, we round off the guide on how you could install the OTA update on your rooted Nothing Phone 1. All your queries are welcomed in the comments section.
System Update Missing from Settings in Nothing Phone 1 [Fixed]Install OTA Updates and Firmware via ADB Sideload in Nothing Phone 1How to Pass SafetyNet in Rooted Nothing Phone 1How to Relock Bootloader on Nothing Phone 1
About Chief Editor

