So I, along with many other users, have installed this testing build on a backup PC. So there aren’t any intentions as such to sync all the data from this Insider Preview build over to our primary account. Rather, a much safer approach will be to create a local account and carry out all the tasks using it. Then when we are done using it, we may easily remove that second account from that PC, without affecting any of the data of our primary account. Well, this is just one of the many reasons why you would want to create a new local account on your Windows 11 PC, there could be countless others. So without any further ado, let’s get started with the instructions.
10 Methods to Open Command Prompt (CMD) in Windows 11How to Replace PowerShell with Command Prompt in Windows 11How to Find My Windows 11 Product Key or License Key
How to Create a New Local Account in Windows 11
There exist two different methods through which you could carry out the said task– via the Settings menu and using Command Prompt. We have listed both these methods below, you may try out the one that is in sync with your requirement.
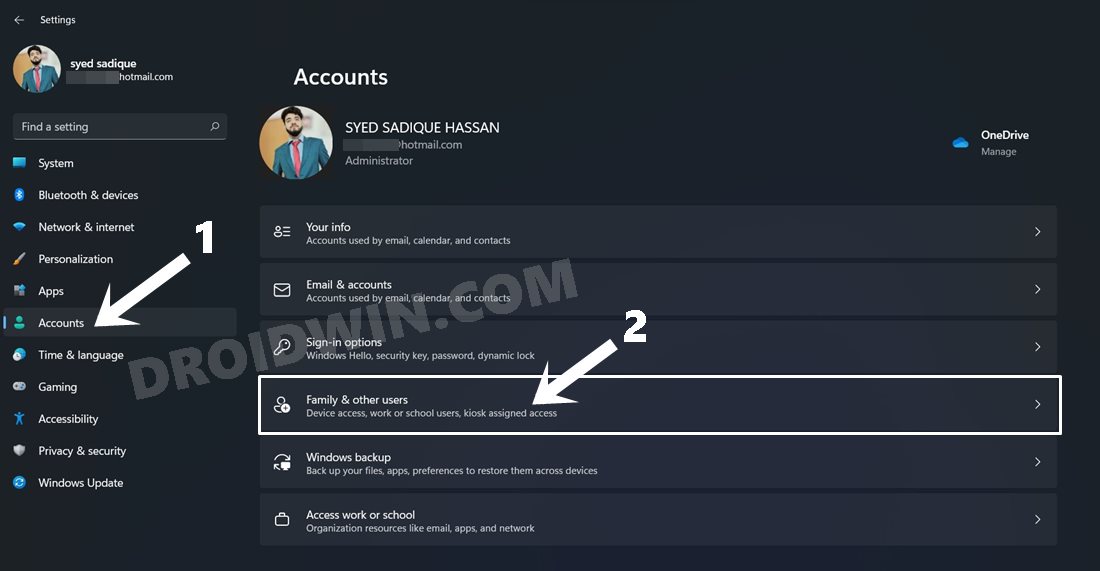
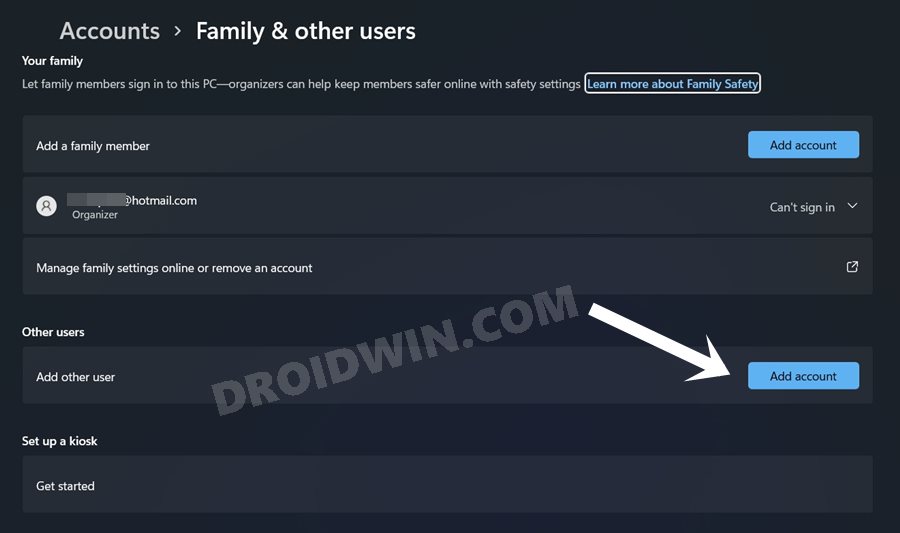
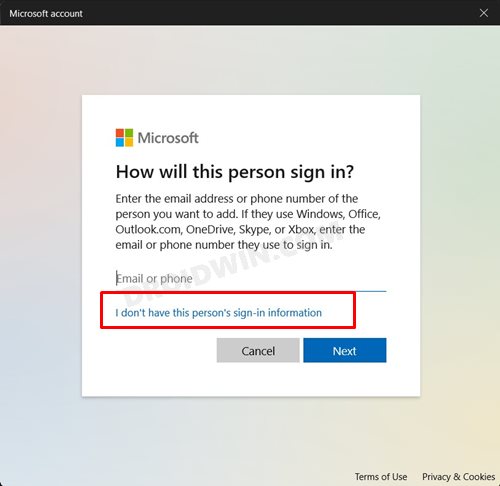
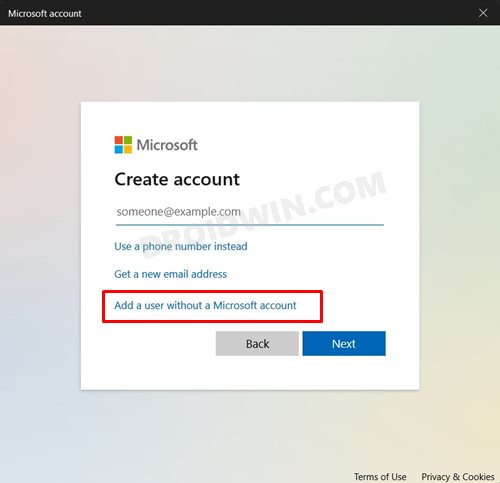
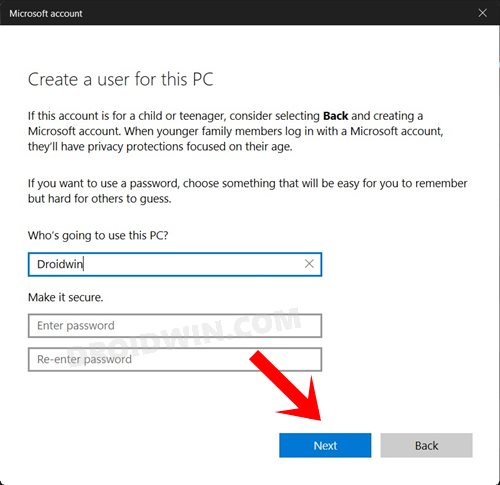
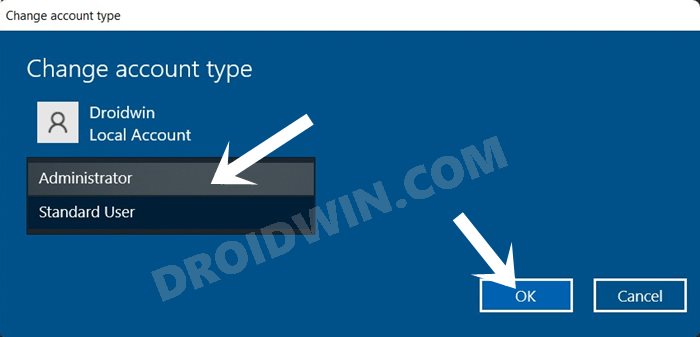
Create a New Local Account in Windows 11 via Settings Menu
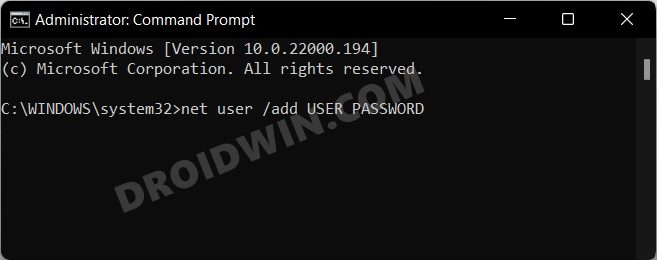
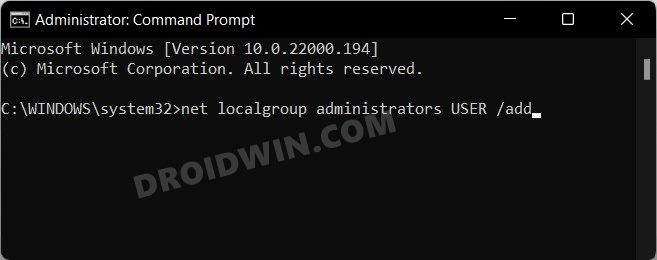
Create a New Local Account in Windows 11 via Command Prompt (CMD)
That’s it. These were the two different methods to create a new local account on your Windows 11 PC. If you have any queries concerning the aforementioned steps, do let us know in the comments section below. We will get back to you with a solution at the earliest.
How to Send or Move the Taskbar Icons to the Left in Windows 11How to Change Taskbar Size in Windows 11Windows 11 Right Click: How to Get Windows 10 Context MenuHow to Get Back the Windows 10 Start Menu on Windows 11
About Chief Editor

