However, Chrome seems to be giving a tough time when it comes to webcam access on the latest iteration of the OS. With work from home becoming the new norm, video and conference calls are seeing an incremental rise in their usage like never before. However, the users who are trying out the web clients of these apps are having a tough time as of late. Many have voiced their concern that they are unable to use the camera inside the Chrome browser running on their Windows 11 PC. Moreover, the issue seems to be just within this browser ecosystem because as soon as the browser window is closed, the webcam seems to be working well and good again. So if you are also getting bugged with this issue, then this guide shall help you out. In this tutorial, we will make you aware of various methods to fix the issue of the Google Chrome camera not working in Windows 11. Follow along.
Google Chrome Camera not working in Windows 11
Do note that there’s no universal fix as such. You will have to try out each of the below-mentioned workarounds and see which one works best in your favor. So with that in mind, let’s get started.
FIX 1: Try Basic Troubleshootings
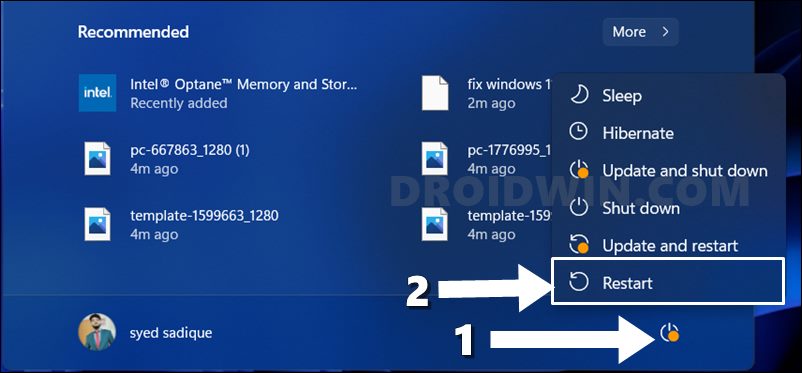
First and foremost, consider restarting your PC. In many instances, a simple reboot is all that is needed to rectify the underlying, So give your PC a much-needed restart and then check out the results. Likewise, also verify that none of the other apps are currently using your PC’s webcam. If an app is currently having access to the camera, then close it right away and then verify if the Google Chrome camera not working in Windows 11 has been fixed or not.
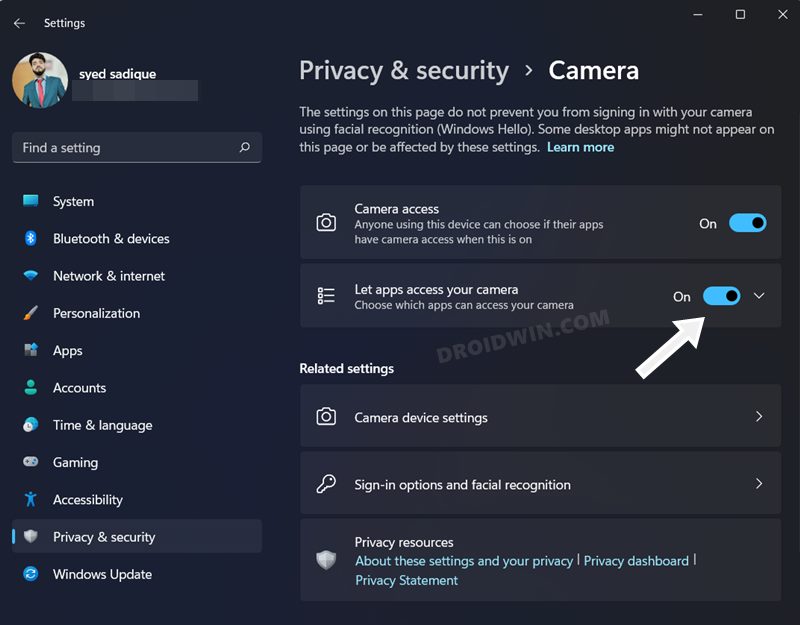
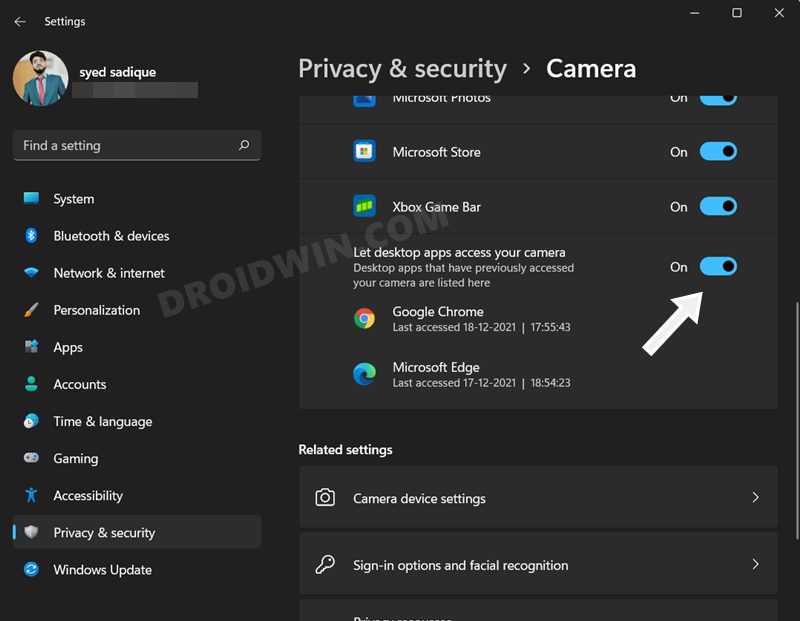
FIX 2: Enable Camera Permission
Next up, you should also verify that Google Chrome is allowed to have access to your PC’s webcam. If that is not the case, then grant it the said permission using the instructions given below:
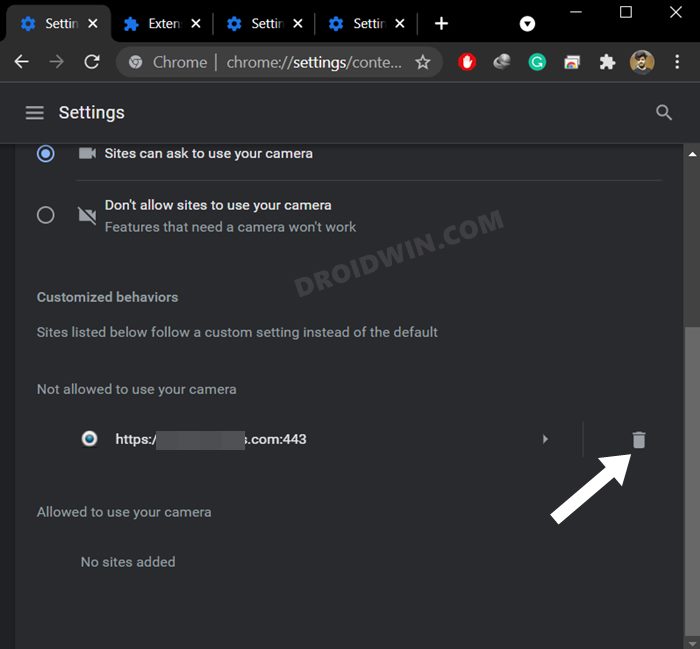
FIX 3: Verify Site’s Permission use Camera
Not just for the browser, you will also have to grant access to the camera to each individual site as well. By default, none of the sites are allowed to access your PC’s webcam due to security concerns. So refer to the below instruction steps and enable the camera permission for the site of your choice.
FIX 4: Disable Extension
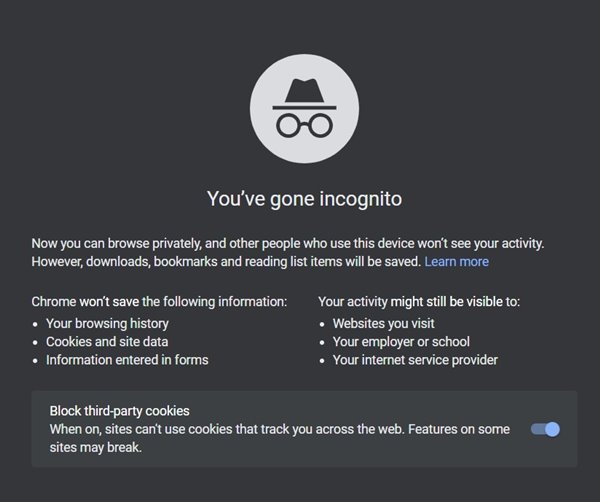
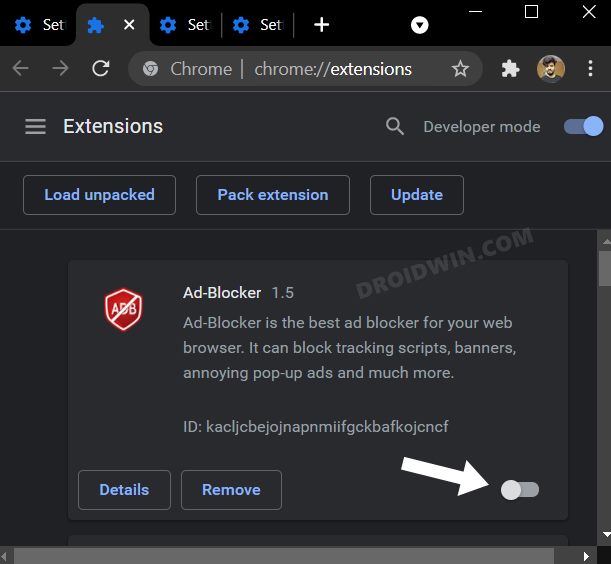
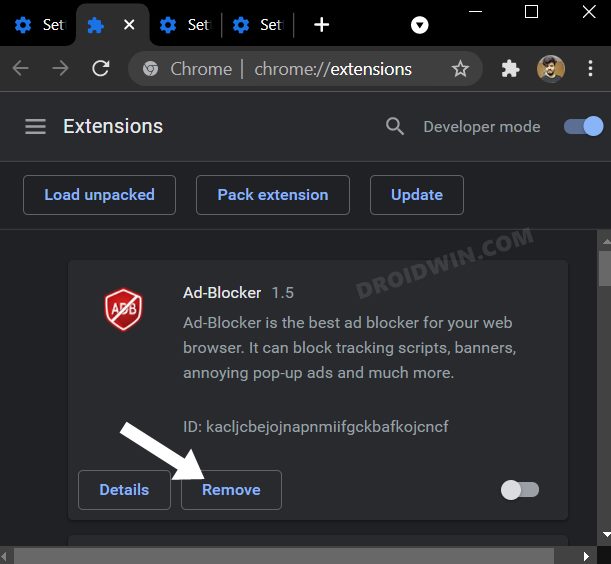
In some instances, a third-party extension might conflict with the normal functionality of the browser. First off, let’s verify if that is the case or not, and if the culprit is indeed an add-on, then it’s better to disable it. Here’s how all of them could be carried out:
FIX 5: Delete Cache and Cookies
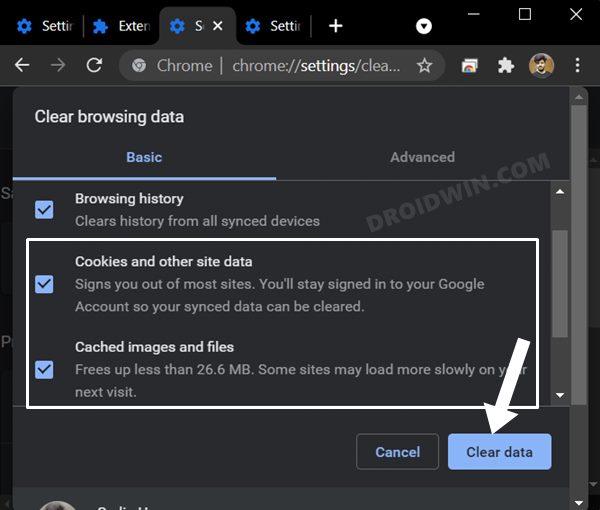
If a lot of temporary data gets accrued over the due course of time, or if the stored data gets corrupted, then it could spell out trouble for the entire browser. Therefore you should consider deleting these data and then let the browser re-populate the same from scratch. Here’s how:
FIX 6: Run Camera Troubleshooter
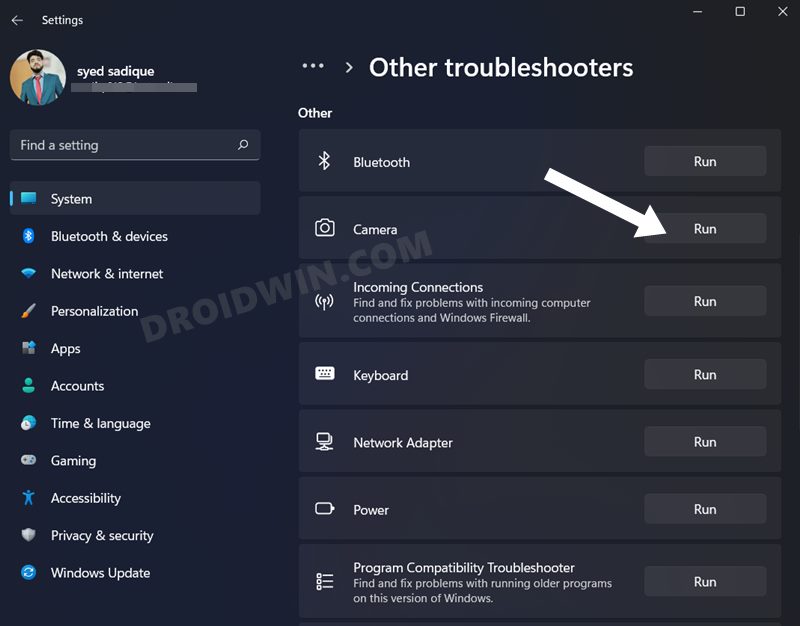
Windows comes with quite a few troubleshooter apps and one of them focuses specifically on camera-related issues. So let’s put it to the test right away.
FIX 7: Update Camera Drivers
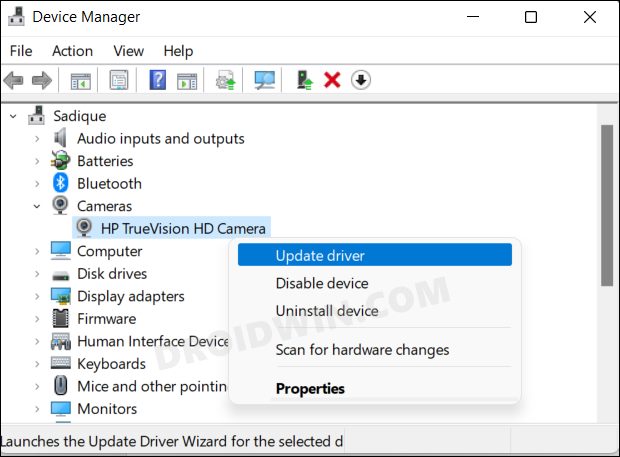
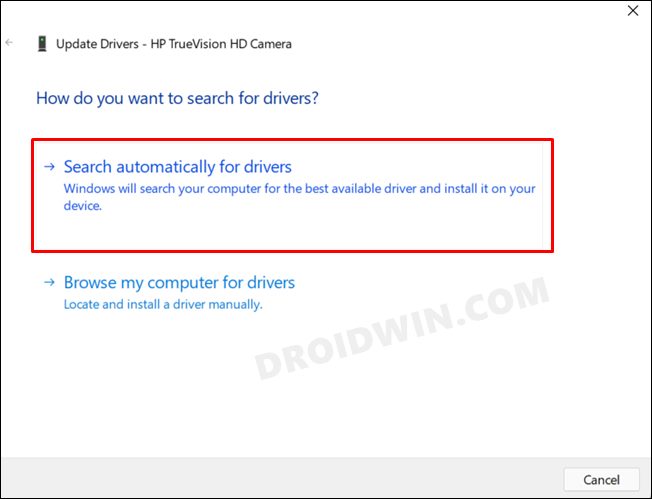
An old or outdated camera driver software would not only be a cause of concern for your webcam but also for all the apps that are dependent on it, which, as of now, includes Chrome as well. So check for a pending update for these drivers, and if available, download and install them right away, using the instructions given below:
FIX 8: Re-Enable Camera
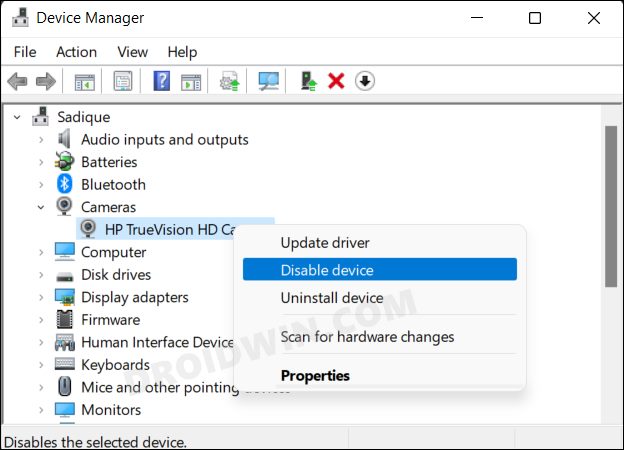
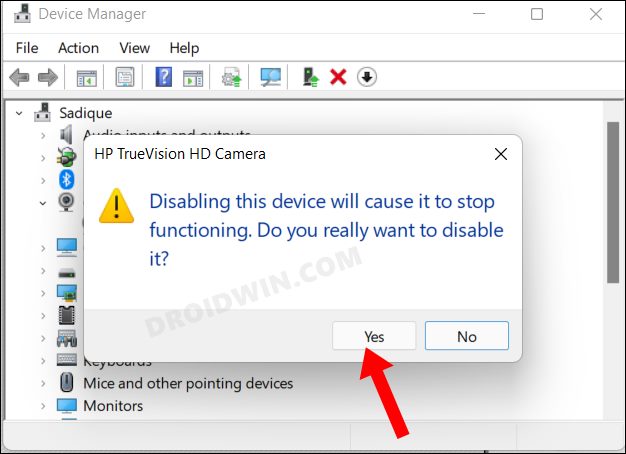
You could also consider disabling and re-enabling the camera drivers. Doing so will give the webcam a fresh instance to work upon and this, in turn, might rectify the underlying issue as well.
FIX 9: Disable Antivirus
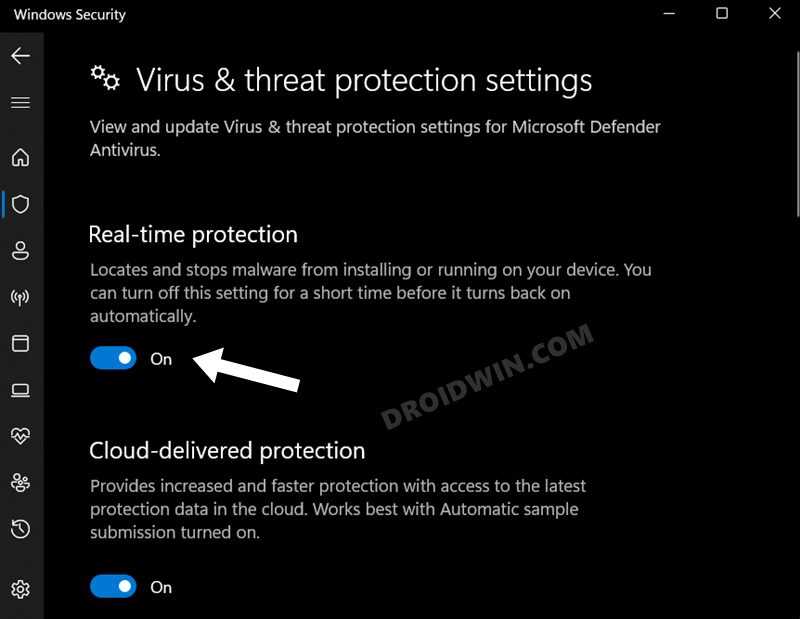
In some instances, the Firewall or an anti-virus app might prevent the third-party apps from accessing your PC’s webcam. To verify if that is the case or not, you should consider temporarily disabling the antivirus app and then check out the results. The below steps are for Windows Defender, if you are using any other app, then check out their Settings page for the disable rule.
FIX 10: Reset Browser
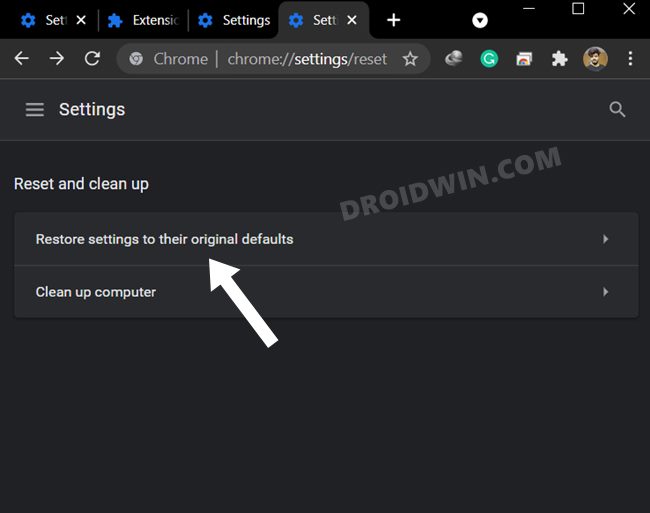
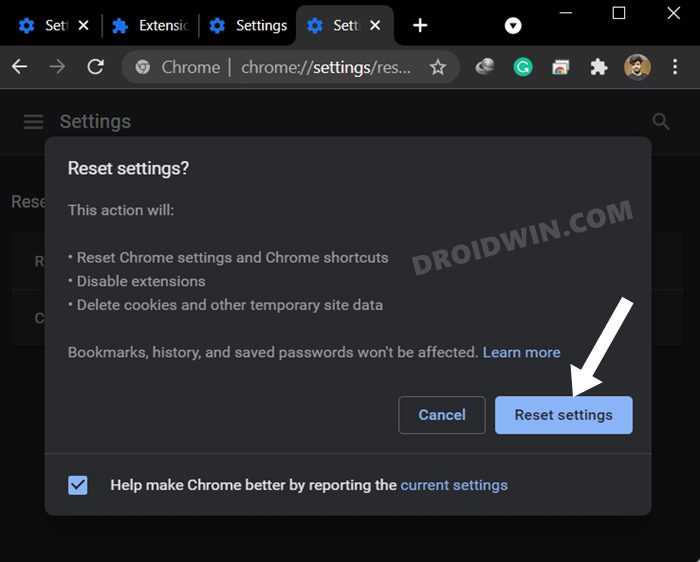
If none of the aforementioned methods managed to work out for you, then you should consider resetting the browser to its factory default state. Doing so will remove all the customizations, tweaks, delete cache cookies and history and disable all the extensions as well. So make sure to sync all the browser data with your Google account beforehand before proceeding with the below steps: So with this, we round off the guide on how you could fix the issue of the Google Chrome camera not working in Windows 11. We have listed ten different methods for the same. Do let us know in the comments which one spelled out success for you. Likewise, all your queries are welcomed in the comments section below.
How to Enable Local Security Policy secpol.msc in Windows 11 HomeWindows 11 Update Stuck: How to FixCannot Delete Folder in C Drive in Windows 11 [Fixed]Developer Mode not working in Windows 11: How to Fix
About Chief Editor
